Follow the progress of Keenan Real Estate, as we purchase, renovate and sell this 1980's style town home in the heart of Parker, CO. During the next few weeks we will document our progress and would love to have you follow us as we walk through the steps of how we:
- Found the right house;
- Assembled a project team;
- Established a budget;
- Decided what to keep and what to toss, and
- Handled surprises and managed the chaos of construction from start to finish.
For this first installment, see why Keenan Real Estate chose the house we did and how we assembled the team. You'll also get a sense of how we budgeted the project and how that will inform our decisions moving forward.
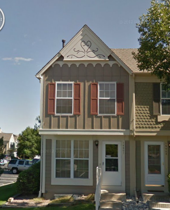 Making the decision. Keenan Real Estate purchased this home because it was in a fantastic location, where there is little inventory (should be easy to sell) and it was a manageable first remodeling project.
Remodeling tip 1: Look for a house with "good bones," meaning it doesn't suffer from extensive neglect and disrepair and the inevitable resulting damage. It should be structurally sound and be able to be renovated without completely rebuilding it. Sure, anything can be fixed and rebuilt, but if the renovation is too extensive, it just might be better tearing down the house and building new. So getting an architect, a builder, or both to help assess the condition of the existing house before purchasing is critical.
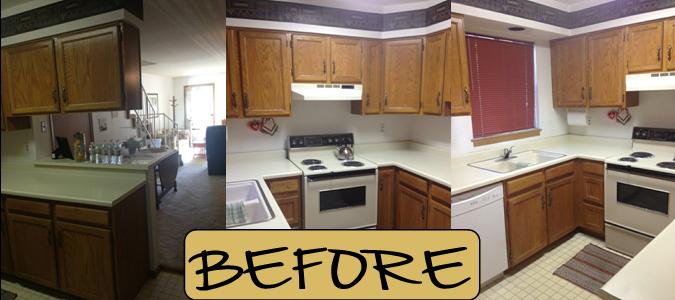
Look past the cosmetics. We didn't let all of this outdated carpet, counter tops and appliances scare us. Let's face it, who hasn't been on a house search and walked into a home and wondered, "What were they thinking?" But in this house — it was just a passing of time.
Remodeling tip 2: With your construction team in tow, take a careful look at the existing house. Climb into the attic, check for signs of settling, analyze how difficult or easy it will be to restructure the rooms, assess the condition of the heating and cooling system, and assume nothing meets current code and that all of it will have to be brought up to date. Don't, as they say, have your eyes wide shut.
Establish a preliminary budget. Keenan Real Estate, like all of us, has a budget that has to be adhered to. So, again before closing on the purchase, Keenan Real Estate met the contractor at the house to toss out ideas and likely costs. Doing this enabled the team to walk into the project with eyes wide open.
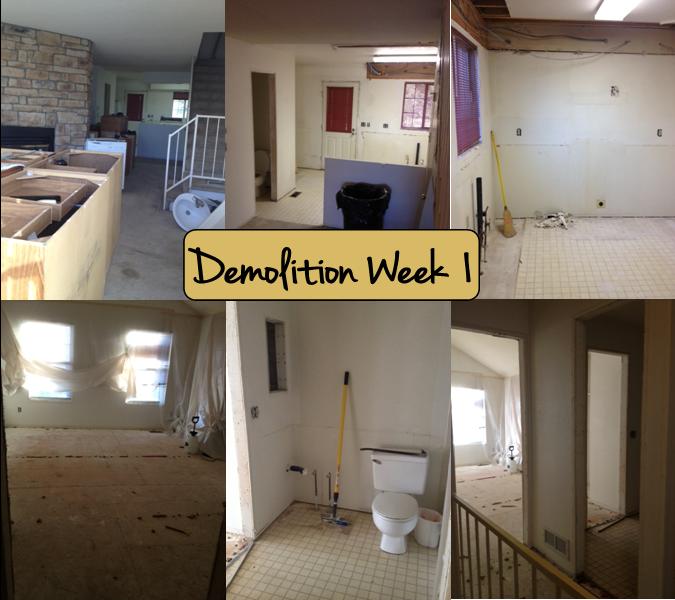
Demolition: We are now actively engaged in the demolition phase of the project. We started demolition in earnest right after we closed on the property. We did a walk-through with the builder just before demolition started so that we all had a really good understanding of what will be removed and what will stay, as well as what will get stored and reused.
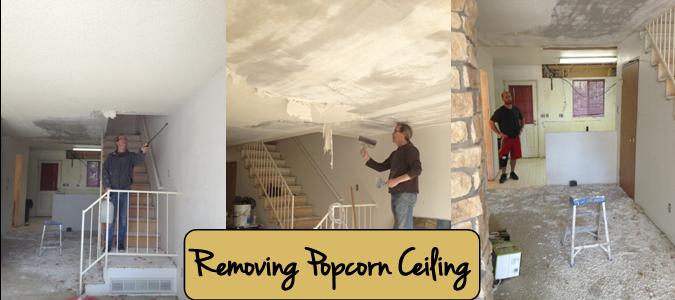
Remodeling tip 3: Removing a Popcorn Ceiling
Before going to the entire process of removing popcorn ceiling, it is necessary to take some of these important considerations below:
The first thing you need to do is to survey your rooms for the presence of asbestos in popcorn ceilings. Popcorn ceiling built from the early 70s contain asbestos. If you could feel that there is asbestos present in your ceilings, then don’t ever do the procedure on your own, instead, remove a small piece of the popcorn ceiling and send it in for testing. You must contact professionals who can do the proper removal and disposal of popcorn ceilings to reduce the risk of cancer from asbestos. You can only remove popcorn ceiling on your own if your ceiling is asbestos free. We have a local company here in Denver that I use and get a discount when testing. Call me and I’ll explain what you need to say in order to get my special discount. Their information is listed below.
Ashley Cole
Reservoirs Environmental, Inc.
5801 Logan St. Suite 100, Denver CO 80216
Phone: 303-964-1986 x29 / Fax: 303-477-4275
email: gina@reilab.com
Step 1: Prepare the Room: Remove furniture and items in the room. Seal off the entire room by hanging two millimeter plastic sheets from the crown molding all the way to the floor. Put a window fan in the window for added ventilation. Add a drop cloth with a waterproof backing to the floor.here. We have a local company here in Denver that I us and get a discount when testing.
Call me and I’ll explain what you need to say to get the special discount. 720-515-0248
Step 2: Spray the Ceiling: Use a basic garden sprayer to wet down the ceiling. This will soften the ceiling texture and help to break down the adhesive bond making scraping easier. Work in an area about 5 feet square. It’s better to make several passes than allow the popcorn ceiling to absorb too much water which could damage the paper surface and the wallboards underneath.
Step 3: Scrape the Ceiling: Wait 10-15 minutes for the water to soak in and then start scraping it off with a ceiling texture scraper. Use a smaller putty knife to scrape the corners and the crown molding.
Week 3
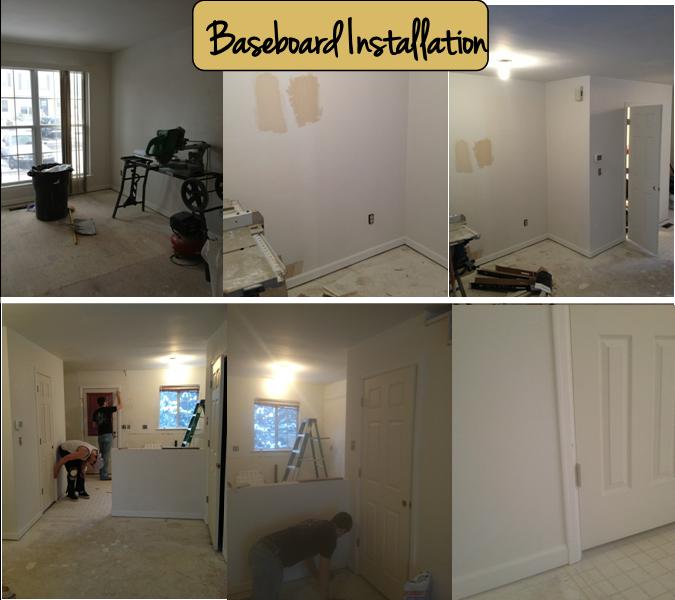
This week, we put baseboard around all the rooms and we couldn’t be happier with the results of the project.
Remodeling tip 4: Installing baseboards. We found this great youtube video that shows the process. Let us know if you have any questions and we will forward it to our baseboard experts.
Week 5
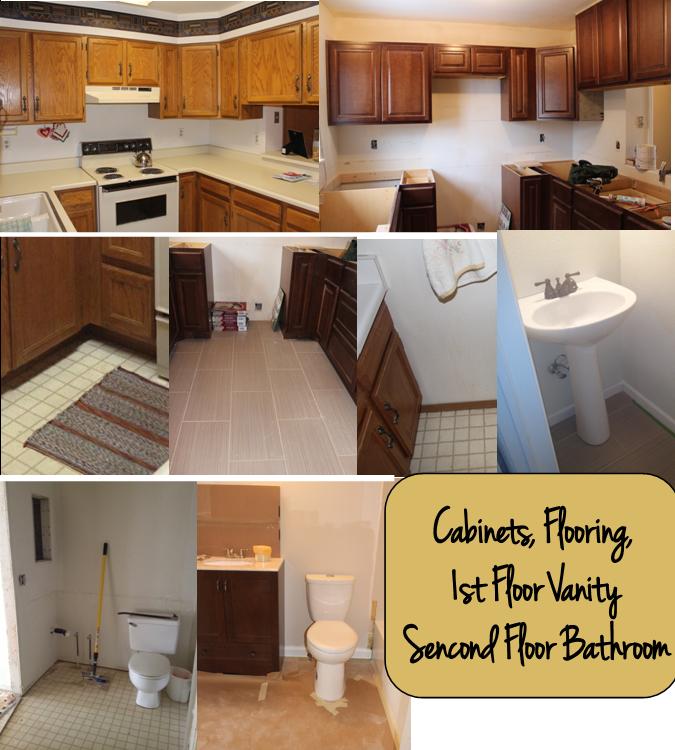
After some much needed snow, we had to put our work on hold for a few days. But, we are back at it and have accomplished several tasking including: putting in kitchen cabinets, tiling the floor and we are working on the back splash.
We decided it was necessary to tear out the old cabinets and install brand new cabinets to add a much needed modern look. And, installing kitchen cabinets is not as hard as you may think and luckily, our handy man is well versed in cabinet installation. Here are some of highlights to help you with cabinet installation.
Remodeling tip 5: Cabinet Installation
Highlights:
Step 1: Mark the Studs
Take out all cabinet drawers and remove all cabinet doors, marking them as you go. This will lighten the cabinets for easier installation.
Find and mark all the studs. Then, measure from the ceiling and make a line where the cabinets will be placed.
Cabinet Installation Tips:
- Hang the upper cabinets first so the lower ones won’t be in the way during installation.
- It’s a good idea to work in pairs with this project, as cabinets can be heavy.
- Use a ledger board to help hang the upper cabinets and keep them straight.
- Mark your studs before you get started.
Step 2: Insert Screws for the First Cabinet
Level line and screw a ledger board along it. Lift the cabinet into place, and if someone is helping you (recommended) have them help you hold it steady .
Sink two screws into each stud behind the cabinet, one on top and one on bottom. This ensures the cabinet is secured. If a cabinet only
Step 3: Install the Sink Cabinet Step
Next, tackle the sink cabinet, which is often the toughest cabinet to install. First, measure the plumbing area and mark where holes need to be cut. Cut along the marks and lift the cabinet into place carefully.
Adjust the cabinet to meet flush with the other cabinets using a level and shims. Use quick clamps to secure them into place
Step 4: Secure the Remaining Cabinets
Pre-drill holes along where the cabinets will be attached together. Sink a screw into those holes.
Put shims in the space between the wall and the sink cabinet, along the stud lines. Sink drywall screws into the wall, through the shims, securing the cabinet to the wall.
Often there are gaps where the cabinets meet the wall, preserve these gaps because walls are often uneven, so the gaps keep the front of the cabinets flush and will be covered later by the countertop.
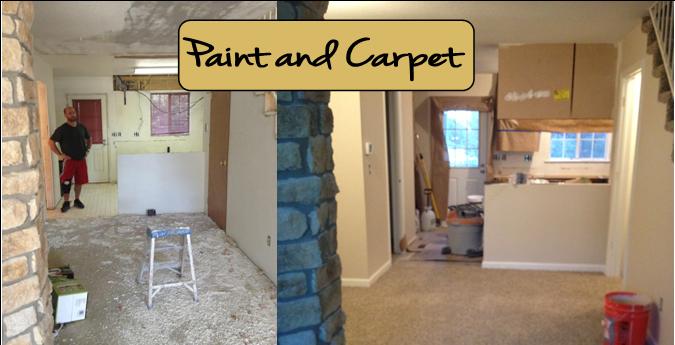
Well, I think we have given our renovation a little personality. The carpet and paint look great and nothing brings more life into a home than a fresh coat of paint. We chose a neutral, popular color because we plan on reselling quickly.
Below is a great link to tips for painting like a pro. Before you get started on your DIY paint project this is a must real. PAINT LIKE A PRO
Week 7.
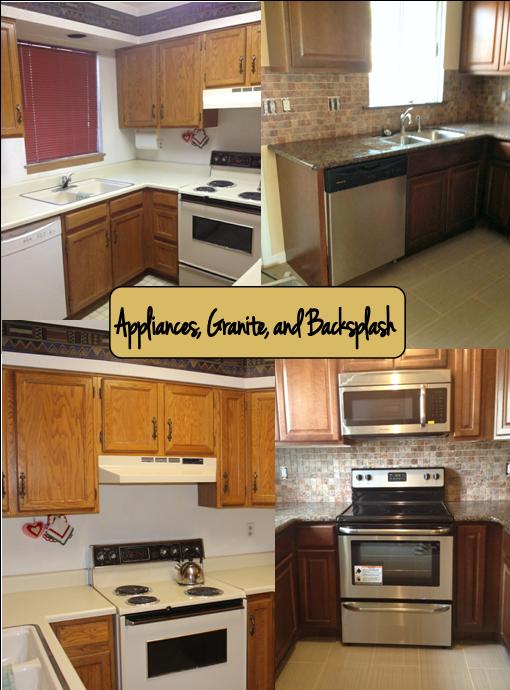
This week the granite counters were installed, along with the backsplash and stainless appliances. It really looks great. Our tile expert, Doug, did a fantastic job. The tile is 2 x 2 cut pieces laid on one foot square sheets.
There is a great instructions on DYI to get you started. CLICK HERE
I do believe that tiling a backsplash above the counter is one of the easiest ways to upgrade an old, tired kitchen on a tight budget. And, you can choose from the vast array of handsome ceramic or mosaic tiles available, including the easy-to-install ones. Take a look at what we did below.
We are almost ready to SELL! We are finishing up the basement and they we are ready to list.
Here is the link to our next listing. CLICK HERE


